

If your business needs easy access to electrical sockets and other data ports throughout its premises, floor boxes are the complete option. But how easy are they to install, and what does the process involve?
On this page, we explain how to:
Quick links:
Floor boxes are designed to be installed in raised floors. (You can read more about raised floors and how they accommodate floor boxes here.)
Although there are lots of models on the market, generally the products aren’t too different in terms of:
Most are made of robust steel or stainless steel, although some are also available in brass or bronze.
However, many of the latest floor boxes are designed and manufactured to offer easy installation and quick removal. These are branded as “fast fit” or “easy fit” floor boxes—CMD’s range of floor boxes being one example. We explain these in more detail below.
Below, we talk you through the typical process for installing a fast-fit floor box. Where relevant, we also explain how the process might vary for a standard cavity floor box (i.e. one that isn’t fast-fit).
Obviously, to fit any floor box, you need to first make an opening (also called an aperture or cavity) in the floor. The larger your premises, the more floor boxes—and the more openings—you’re likely to need. CMD recommends a layout or configuration of one floor box every 10 square metres.
As cutting into a floor is fairly skilled work that requires the proper equipment, you might choose to hire a tradesperson. They will use tools suitable for cutting whatever material your flooring is made of. For tiled or wooden floors, for example, they might use a jigsaw. For concrete, they may opt for a circular saw or concrete saw.
They will cut a hole that snugly accommodates the floor box while allowing for any cut-out tolerance. The way floor boxes are manufactured means they can be up to 3mm larger than their given dimensions—this difference is known as the cut-out tolerance.
Once the openings are made, you can begin installing the boxes. Bear in mind that if you haven’t bought the box pre-wired, you’ll need a qualified electrical contractor or electrician to do the wiring.
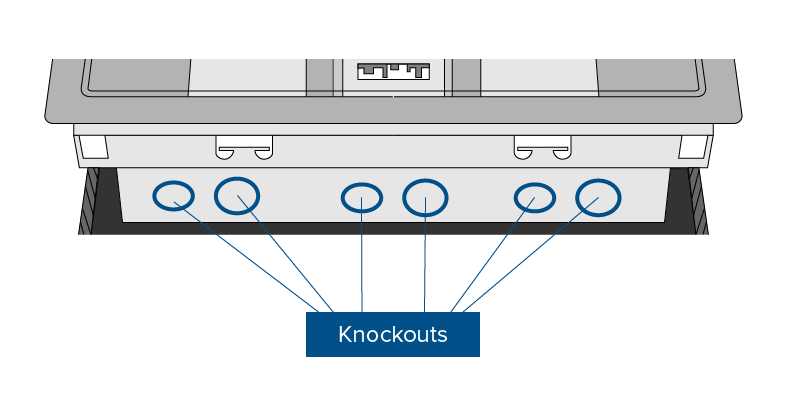
First establish in which direction the cable under the floor is running. Once you know this, you can remove the relevant knockouts on the floor box. The knockouts are the circular holes through which the power and data cabling systems connect to the modules inside the box, as shown in the image below.
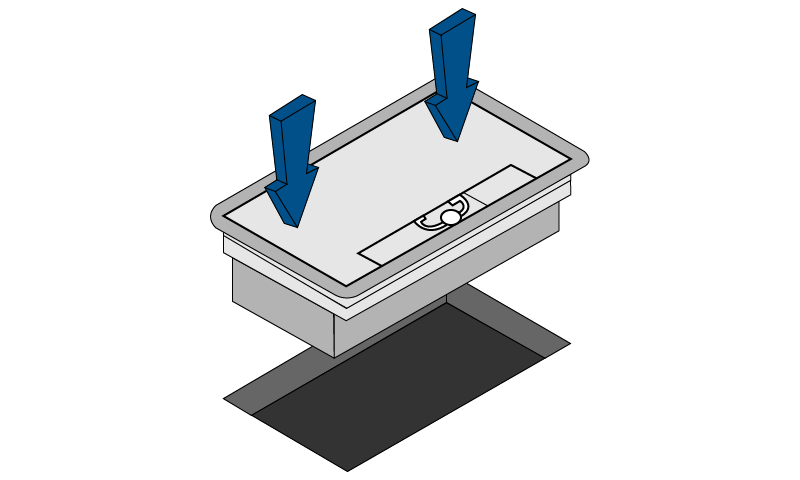
Position the floor box over the opening, in the correct position for accepting electrical connections.
Many fast-fit models can be installed without you having to detach the lid. Standard floor boxes, however, might have a protective cover that you must unscrew and lift off before you can place the box into its opening.
If the floor box has modules already fitted (but not pre-wired), you might also need to remove these too, so you’re left with just the base of the floor box. Again, this should involve no more than unscrewing them and taking them out.
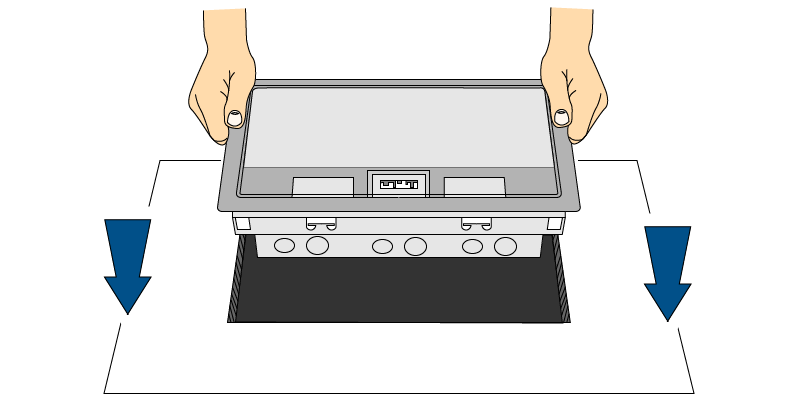
Lower the floor box into the opening and push down firmly on both ends of the box at the same time. This will engage the fixing latches on either side and secure the box in place. Most boxes have non-trip cable outlet brackets that keep all cords and wires out of the way.
Many standard floor boxes have adjustable toggle clamps that fix to the floor around the edge of the opening. Simply turn the screws to tighten each clamp and the box should stay securely in place.
You might also need to:
If you’re doing any wiring yourself, ALWAYS turn off electricity at the circuit breaker or junction box and test that the power is off before you begin.
Many fast-fit models have their hinged, reversible lid already fitted, so it can remain in place during installation or removal. If not, you should be able to fit the lid and trim by pushing them into place. The ratchets allow the trim to line up and find the correct floor level.
With some standard floor boxes, you might need to fix lids and covers into place, either with a screwdriver or an Allen key.
The following instructions are for floor boxes designed to be installed in newly poured concrete or screed floors which will then be finished with wood, tile, vinyl, carpet tiles or more concrete.
Typically made from stainless steel, these recessed boxes are watertight and concrete-tight, as they are often used below a level where there might be excessive moisture.
Other floor boxes are made to be retrofitted into existing concrete floors, and as such lack the features that protect the inner components from the poured concrete or screed.
Position the box as necessary. Set the temporary cover to match the height of the finished floor and make any levelling adjustments.
Use screws, nails or wire to secure the box so it won’t float when the concrete or screed is poured.
Unscrew and remove the temporary cover (sometimes called a mud cap).
Run the necessary power cords to the floor box.
Reattach the temporary cover.
Once the concrete or screed has been poured, set and finished, install any cover plates and/or accessories.
This will depend on the model of floor box you have, but, generally, you should be able to follow these steps:
If the floor box has locking handles, lift them so they are no longer locking the box in place.
Many fast-fit floor boxes allow you to remove them without taking off the lid. If this is the case, simply lift the lid to an open position.
Look for the steel clips on either side of the box. Insert a flat-blade screwdriver into the slot in one of these clips—whichever side is easier in terms of whether you’re left- or right-handed—and lever outwards until the clip comes into contact with the moulded trim. Hold in this position.
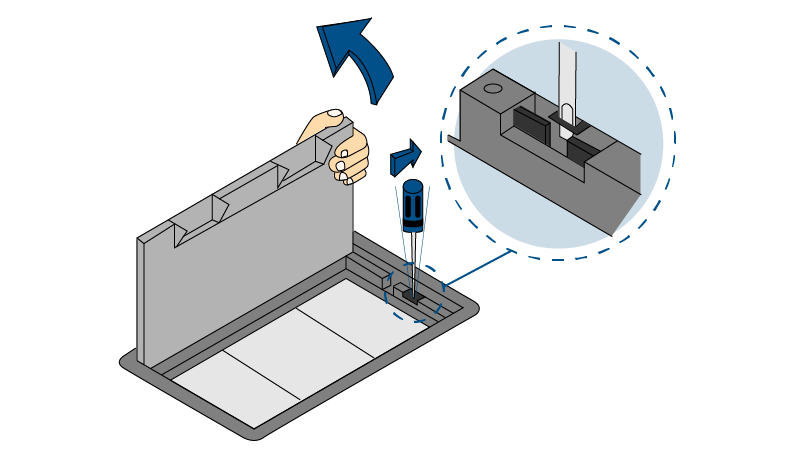
Lift the box out of the floor, using the lid as a handle.
Some floor boxes are marketed as “fast fit”, “fast fitting” or “easy fit”. This means they have been designed and manufactured for fast installation in a busy working environment, without the need for any tools or specialist equipment.
Fast-fit floor boxes often come pre-wired, where the supplier has already connected the wiring, sparing you the job of doing the electrical installation yourself. These pre-wired boxes are equipped with a tap-off unit that you connect to the mains power supply via an underfloor busbar or similar.
Depending on your requirements, you might prefer to buy floor boxes fully assembled, rather than provided as parts to put together yourself. As a floor box supplier, CMD is very flexible and able to accommodate you.
Floor boxes—their features and how they can benefit your business premises